 This card almost didn't make it to the person I made if for because I liked it so much!! I know she did too! Happy Stamping!!
 This card almost didn't make it to the person I made if for because I liked it so much!! I know she did too! Happy Stamping!!
 Very simple but very elegant! I love this card!! I used LOTS of shimmer spray on this one too!! Happy Stamping!
 In real life you can see that Dasher is misted with shimmer paint spray and adds a nice touch to the card still leaving it masculine. I liked the card so much I had to make another one with a few differences.
 Hope you all are having a wonderful Christmas Eve! Happy Stamping!!
 Here are a couple of close ups of them.


 I kept it simple not only because of time but so that they would easily go through the mailing system. I have had previous card get to the recipient in shreds, needing extra postage, bent and broken or just never making it at all. So this time I made it using flat layers with only one off them puffed up. To add a little bling I used iridescent ice to the tree, plus the DSP has a bit of a metallic hint to it. I love how it came out!! Happy Stamping!!


 But after making these two I realized it would take me forever to make them with the embossing paste so I used versamark and embossing powder on the rest of them (like the card) and they came out super cute! I hope that they found their gift useful! Happy Stamping!!
 I think it came out well! I used some left over rub ons I had when I made the glitter ornaments. Happy Stamping!!
 I liked it but it was just a little to plain for the wow factor I wanted. So instead I will be using it to put a gift in. It's actually a good size box measuring 6x3x4, it'll hold a lot of chocolate!
 Happy Stamping!!

 This was part of the free gift everyone got for attending ... I had it filled it up with lots of goodies. Happy Stamping!!

 We took tea light candle and transformed them to be a bit more decorative by adding stamped tissue to the centers. Just lightly warm the candle with your heat gun until the tissue paper is absorbed. We punch a small circle for the wick before heating them. The box was made using the Christmas Cocoa DSP. Basically I just made the measurement to fit 3 tea lights. The top is made using our window sheets. Happy Stamping!
 All you do is take the clear glass bulbs drop some reinker into and roll it around until it is covered entirely. It does talk a bit but well worth the wait. After the ink has covered the glass ball then you sprinkle in the glitter. I then added a bit of ribbon and a rub on. Happy Stamping!!

 circle punch. The stamp set I used was Delightful Decorations from our Holiday Mini. I then slide them into a pretzel bag that you can get at a craft or candy supply store. On the left you can see a close up of the tag I made. The little crystal is one of the crystal brads that I popped out of the brad. Happy Stamping!!
 It's actually one of the clear envelope scrapbooks like the one made here. I got the idea for the trees from the ever so wonderful Brandi Wiggins and she got the idea from someone else. These are real easy to put together just takes a few times to get the folds just right. Basically it's a half circle which I embossed with the embossing folder then folded to make the tree shape. The stumps I ran through a crimper. I have to tell you IRL it looks even better! Happy Stamping!!
 Isn't it great!! I love how the big shot can be used on all kinds of different materials. This little pocket can be used for a gift card holder as seen here or perfect for other small gifts like movie tickets, tea bag holder, for candy canes, jewelry ... you get the idea!! I did stitch the edge free hand but the project is small so it only takes a minute! Happy Stamping!!
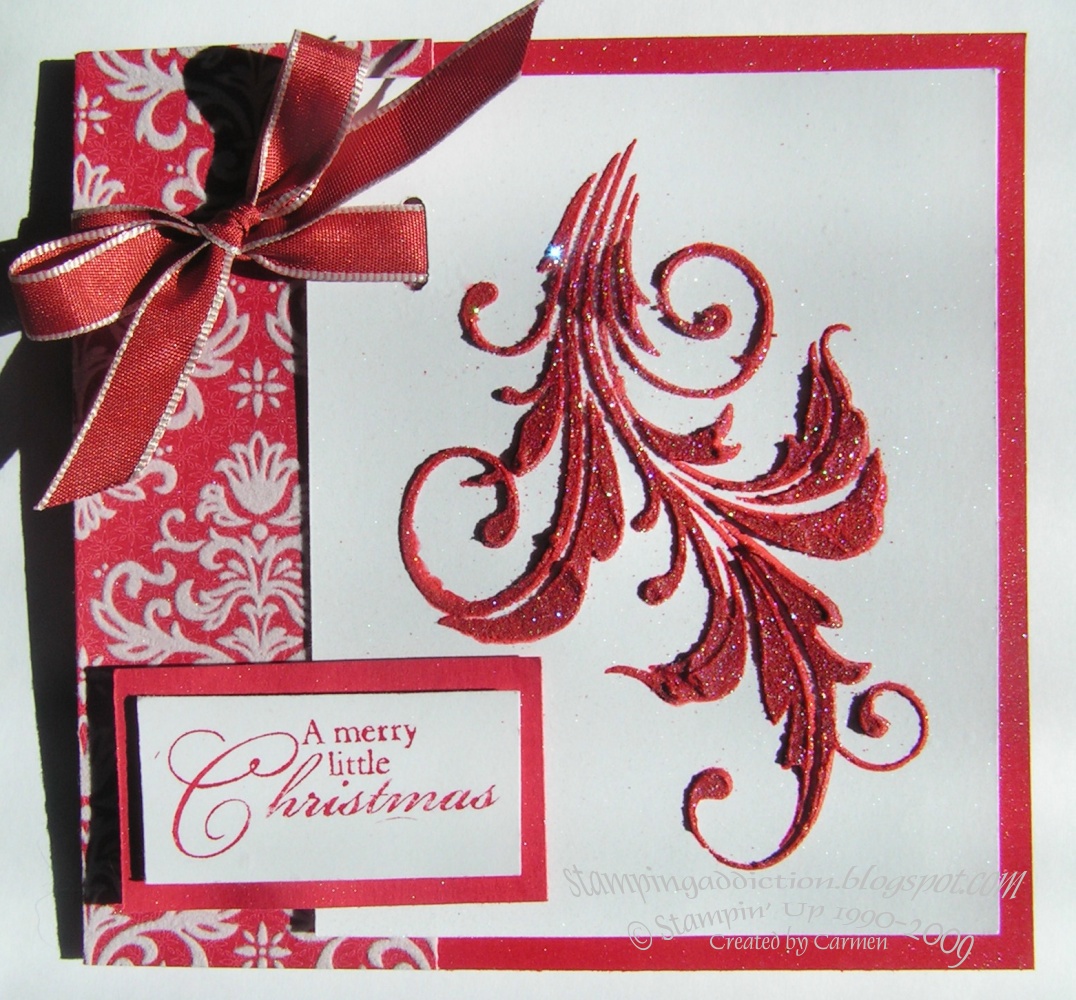
 I don't think I will be able to part with this card ... so I'm going to HAVE to make some more!! I just love all the things you can do with our Decor Element Stencils. First I sprayed all my pieces of cardstock with our shimmer paste to add a little extra sparkle to the background. Then I used one of the swirls from the Vintage Ornament set. I slathered stencil paste over it after I dyed it this beautiful red tone. If you look at the small picture on the right you will be able to see all of the texture it created. I also sprinkled dazzling diamonds over it before it dried. Last I added the ribbon and the sentiment!! Isn't it gourgeous!!!! Happy Stamping ... don't forget to check out our sale below!
 I hope that his set makes it into the main catalog next year! This stamp is great to use as a medalion and build up on the image with layering. In this card I used the build a brad for the ceter which goes nicely with the layers. Happy Stamping!!
 I've been trying to design my Christmas cards this year but can't find a design I like. My mojo has seemed to slipped off for a bit. Hopefully it will return sometime soon ... in the meantime Happy Stamping!!
 This was originally Lemon Ice Tea flavored Ice Breakers. I used the Eastern Bloom stamp set to decorate it up a bit. Happy Stamping!!
 I embossed each tool on gray cardstock and when I cut them out I colored the handles in with markers. A nice and simple masculine Thank You card. Happy Stamping!


