Thursday, October 28, 2010

Pumpkin Fun

This idea for these pumpkins came from a presentation at convention. Brent Steele's project were some of my favorite's because they all centered around Halloween!! So here are the pumpkins I made!

Here they are individually and you can click on the pictures to see them larger for more detail.


And here they are in the side door window, sorry for the glare.


My son's thought they were pretty fun and helped make them. It's very easy to add the decor elements right onto these foam pumpkins. All of them were done in no time! Happy Stamping!!

Tuesday, October 26, 2010

Letterpress Plates

Ok if you haven't checked out the letter press plates yet they are very fun to use!! Takes a bit of practice but once you have it down they are a lot of fun to use. Here is a card I made using the Trick or Treat plate.


Happy Stamping!!

Sunday, October 24, 2010

Simple Halloween Greeting

When I saw the set Dark and Dreary I just had to have that set just because of the candelabra that was in it. We won't talk about how often that happens but instead check out this card I made:

I colored in the candelabra with markers and my blender pen. I then added some iridescent ice to the flames on the candles. I also embossed the saying in white ep on the DSP. The DSP is from the hostess pack; which has some really great paper in it!! Added some ribbon, brads and a small strip of cardstock that I used the scallop trim punch on it. Happy Stamping!!

Friday, October 22, 2010

Simple Wrap

Hopefully this post won't be giving me away on the secret sister group I am part of but since it's a Halloween project I wanted to share this before the holiday.


Basically I just made a simple wrap for some tea I had sent her. I embossed the main image with black embossing powder and backed it with black cardstock. I attached that to a crimped piece of cardstock; then added some ribbon and it was done! Very simple! Happy Stamping!!

Wednesday, October 20, 2010

Recycling

I was in the need to make some treat holders and had seen where they had used empty toilet paper rolls as a base and thought it was a real neat idea. Then I saw something similar on Shelli's blog and it reminded me about it. So I came up with this little project.

I used the the Spider Web Embossing Folder and then rubbed my ink pad right over the embossed image to make it pop. I also used the waffle paper on the top ... that's some pretty cool stuff!! To glue the base on I used crystal effects and then sprinkled the chunky glitter. Added the tag and some ribbon on top and it was all done! It's perfect for a few little treats. Happy Stamping!!

Monday, October 18, 2010

Because I Care

This was another one of those cards that I hadn't posted yet that I've had in my files for a little bit.
The picture just doesn't do this card justice, it is soo much prettier in real life. I used my blender pens to add the color the flower to give the depths in color and I seem to tend to forget to use those as often as I should. I also misted the flower with shimmer paint to give some added sparkle to it. Happy Stamping!!

Saturday, October 16, 2010

Just Believe Revisited

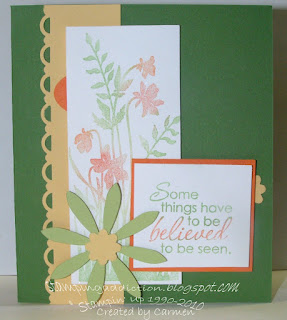
It feels like I have used Just Believe a ton of times but I have rarely used it for my personal use; so here is a card I made for my secret sister last round.

I colored the stamp with markers and spritzed it with water before stamping it on the whisper white paper and it gave it a nice soft touch. I then embellished the card with different scraps I had on my desk for one thing or another that I hadn't used and they worked perfectly with this card!! Happy Stamping!!

Thursday, October 14, 2010

Pink Roses

I found this card in my pictures and hadn't shared it yet. If I recall correctly I made it back in May.

The set I used was Fifth Avenue Floral. I stamped it with versamark then embossed it with black embossing powder. I then watercolored it with several different shades of pink and reds. I also watercolored shimmer paint over the tops of each flower to add some sheen. Happy Stamping!!

Tuesday, October 12, 2010

Display Stamper Project #5 - So Many Thanks

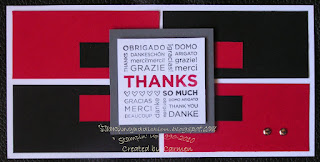
Here is the last card project I created using So Many Thanks.

I ran a white cardstock piece and used the sentiment to stamp all along the strip and then I crimped the piece. I embossed the Crushed Concord base with Elegant Bouquet Embossing Folder. I colored the main sentiment with markers to get several colors. To add some accessories I punched and crimped several Hearts with the heart to heart punch. then added a bit of ribbon to tie it all in together. Happy Stamping!!

And for the customers in my area if you are interested in hosting a workshop today is a great day to get that scheduled. I have a few dates available in November and December or you can always book now for Salebration!! Anyone who emails or calls me today to set up a booking will get the chance to earn a free a la carte stamp from the catalog, but you must schedule it today! (I will add your free stamp to your workshop.)

Sunday, October 10, 2010

Display Stamper Project #4 - So Many Thanks

Here is the next card I made, I really liked this one because the colors were so different and they work very well together.

I used my scallop die to make the scallop circle as well as the purple felt flower from Blossom Party. I crimped the Crushed Concord cardstock. To make the leaf on the flower I used a piece of ribbon which I heated to make the edges more like a leaf. As far as the stamp I stamped the image onto a piece of white cardstock with Crushed Concord ink, then I used versamark on the entire image and then embossed it with several layers of clear EP, and then added one last layer with iridescent ice to make it sparkle. Happy Stamping!!

Friday, October 8, 2010

Display Stamper Project #3 - So Many Thanks

Here is another So Many Thanks Card. This one is smaller than your standard card at 3 1/2x3 1/2.

I used the main So Many Thanks image in background strip as well as the Thanks for the strip sentiment. I created the flower using a long strip of cardstock and on one edge I used the eyelet border punch. I then tacked in the sentiment with a larger rhinestone brad. Lastly I spritzed it with some shimmer mist spray. Happy Stamping!!

Wednesday, October 6, 2010

Display Stamper Project #2 - So Many Thanks

Here is the next card I made using So Many Thanks.

Very simple, I just color blocked the colors. Happy Stamping!

Tuesday, October 5, 2010

Clearance Rack

Wishing you could get some of those retired accessories, paper or dies well don't worry Stampin' Up! just filled up the clearance rack with some new goodies so now is your chance!!


Just click on the picture above to shop now using my online website!! Don't wait as the items tend to go fast!! Happy Stamping!!

Monday, October 4, 2010

Display Stamper Project #1 - So Many Thanks

I have to tell you this stamp had me the most worried about what I was going to create. It was a small single stamp ... I had myself so stressed over these but I think they were the best ones I made, so here is the first card.

It measures 6 x6 so slightly bigger than your standard card. I used the vintage wallpaper on the Marina Mist cardstock to add some texture. I cut the flowers out using my big shot and the Blossom Party die. Added some ribbon and accessories and it was done! Happy Stamping!!


Saturday, October 2, 2010

Display Stamper Project # 8 - Just Believe

Here was my last project I created using the Just Believe stamp set, a note pad holder. It was one of my favorites!!

Early Espresso and Daffodil Delight compliment each other perfectly! I stamped the main image with Brown Staz On and then used my versamarker to add some iridescent ice o the flowers. There is also a smaler flower corner that I used in the background using versamark and iridescent ice. Lastly I added that wonderful chunky ribbon!! Happy Stamping!
Related Posts with Thumbnails