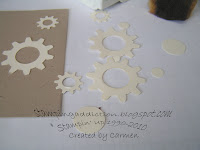
 Start by punching out the pieces you want to inlay into the base of your card. To add a bit of color and depth I then sponged the punched out pieces, in this case the cogs from the Cogs Extra Large punch.
 Then run tape on the backside of punched pieces.
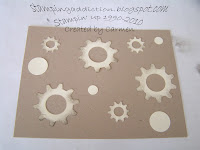
 Place punched pieces onto base cardstock where you want them positioned. Taping them down help them stay in place better.
 After all pieces are attached it will look like this.
 Place into embossing folder. Have your piece facing up with the sizzix/Stampin Up logo on top. Rub through your big shot as usual.
 After it is has been embossed it will look like this and you can embellish as you see fit.
 Hope you found this tutorial useful and as you can see it's a very easy technique to do!! If you do use this tutorial if you get a chance come back and share your card here in the comments. I would love to see them!!! Happy Stamping!


9 comments:
Yep, that's how I have done this technique too! It's too much fun!
Great tutorial! I love this technique!
Such a great technique and a great tutorial!
Such a cool technique - tfs!
Great tutorial!! TFS
Very cool tutorial. The only thing I do different is use the two-way glue pen (only because I can't make the snail work on the little pieces - too fumble-fingered).
Great tutorial! Love this technique.
Your hop card inspired by technique page design for a recent shoebox swap. Thanks! http://runningwscissorsstamper.blogspot.com/2011/03/technique-page-inset-embossing.html
Great job with another fav technique! Thanks for making the tutorial.
Post a Comment