Friday, December 31, 2010

Stampin' Addicts Occasions Mini Blog Hop - Create a Cupcake

Welcome to another wonderful hop hosted by the demo's from Stampin' Addicts!! We are each featuring different stamp sets and accessories from the New Occasions mini!! Better get a pen and paper ready for all the things you will be adding to your must have list (not like I need any help)!!

If you are following the hop in order then you have just come from Barbara's Creative Stampin' Spot and saw all her wonderful project's using Bring on the Cupcake ... too cute!!

I will be showcasing the stamp set Create A Cupcake, this a great set for birthdays and the build a cupcake punch works perfectly with this set. That's one of my favorite things about Stampin' Up! is all the coordinating product. Anyways on to the projects!!

This is a little 3x3 card. it's a pretty simple card and would look great as a gift tag for those birthday gifts. I used the new pompom trim along one side of the card ... it's a fun dimensional little accent!!

This project was almost straight out of the mini catalog. I changed the rosettes to ribbon instead and added the button. I love how every mini and catalog is jam packed with ideas especially when you need something in a hurry!!

This last project is my favorite!!


It's a fun little pop up stand card!! This was so much fun to make!! I hope to make a tutorial shortly to show you all how to put it together! So keep an eye out for it. This card is 3 1/2x3 1/2 and to open the card you just take off the belly band on the right and when you flip the front of the card to the back you clip the silver clip to keep it standing up.

Hope you enjoyed my projects using Create a Cupcake and I hop you enjoy the rest of the hop. The next stop is Mary's Stamp and Scrap which she will be sharing some fantastic idea's using You're a Gem! Happy Stamping!!

Saturday, December 25, 2010

Gift Cards Galore

Hope you all are having a Very Merry Christmas!! Just wanted to show you the different gift cards holders I made for my gift card gifts this year.

The top and bottom ones are for your average gift card size and the one in the middle is for those larger gift cards like I Tunes. Enjoy your day and Happy Stamping!!

Friday, December 24, 2010

Gift Ideas

I have been wanting to make one of those tissue box holders forever and finally got the chance to make this one.

I do have to say it took me awhile to make and I am not sure why as they are really simple. This one I gave to my mom to use for the Holiday season.


This cocoa gift set I made for my Secret Santa gift over on splitcoast. I made it using the Box #2 die and cutting 2 of the them, I then tape then together back to back. Very simple and it cam out super cute!! Happy Stamping!

Thursday, December 23, 2010

Serene Snowflakes Galore

Like I said before I tend to make cards on the fly with whatever happens to be on my desk and Serene Snowflakes has been there for awhile now.

The top three uses the Northern Flurry embossing folder and the last one uses the Vintage Wallpaper one. the last 2 are my favorite!! Happy Stamping!

Wednesday, December 22, 2010

Quick and Simple Gift Bag

Here is a simple but cute gift bag using the mini craft bags. These were made by Judi for our Christmas class. I'll be saving mine to use again and again. Happy Stamping!!

Tuesday, December 21, 2010

Simple Christmas Case

I got this idea from a card I had seen at convention, the only thing that same is the layout otherwise I changed everything else.


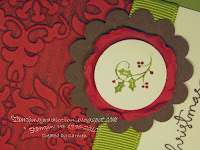
I was trying to figure out how it was embossed with the secondary color so I made a couple of cards to figure it out. The top card I just rubbed on my ink after I had embossed the paper using the Vintage Embossing folder. That wasn't quite right so I rubbed my ink onto the folder directly for the second one and it worked! So you rub the ink on the folder that is indented which is the side that usually has the sizzix/SU logos. Happy Stamping!!

Monday, December 20, 2010

Paper Ornament and Card

Here is a simple card that would also be cute as a gift tag.

It measures about 2 1/2 by 3 1/2.

Here is the paper ornament I made for my tree this year.

It was really simple to put together and again uses dimensional folds scallop "technique". I have a tutorial I will have ready after Christmas showing how I do it. It looks great with my paper cone ornaments!! Happy Stamping!

Sunday, December 19, 2010

More Tags Til Christmas

Here are a few more cards made with Tags for Christmas. These ones are a little more of my normal style.

This one was created for a swap I was in I think back in October. This is probably one of my favorite "techniques" lately; which is to use a scallop and make it a dimensional type fan. After that I added a little texture by rubbing my versamark along the edges and heat embossed some iridescent ice and a little silver waffle paper. I also used some silver paper and embossed it with the vintage wallpaper embossing folder.

I made this card with different scraps I had left over from other projects and measures 4x4. Some of my favorite cards are put together this way and usually happens because I've run out of time and need to make something fast so whatever is on my desk gets used. Happy Stamping!

Saturday, December 18, 2010

Tags til Christmas

I played around quite a bit with the Tags til Christmas stamp set.


This first card I kept adding too trying to get it right and hopefully I didn't over do it. It's much prettier in person; when trying to get a good picture all the sparkles came out more pronounced then they are.


This next card was kind of fun. I think the elements would also look great in a scrapbook page along the bottom as a border. I tried using the Smooch Ink along the design on the ornament and I think I need to learn how to use that stuff better but I really like how it shimmers.

Happy Stamping!!

Friday, December 17, 2010

Giftables Class - Luminary

I always see these fun luminary's that you can buy at stores and thought I could make some of those out of paper. And that's what we did for this last project!

This was probably my favorite!! We used the the Fancy Favor die, snowflake die set, and Northern Flurry embossing folders to create this little cutie! We used a white craft pad to highlight the embossing, snowflake and the edges, it really made the box pop!! These luminaries are perfect for those battery operated tea-lights. It looks even better in the dark but I couldn't get a good picture, you'll just have to make your own to see. Happy Stamping!!

Thursday, December 16, 2010

Giftables Class - Mini Corkboard

This next idea I got from Yapha over at Stampin' Addicts. I just changed it up a bit.

I used the 6x6 page protectors as my base and this also makes the bulletin board interchangeable. Depending on the season I can just change out the DSP, the DSP I used here is from the hostess 6x6 sampler pack.

I thought this were too cute so I made a bunch for a gift exchange I did with some SU friends.

These I was able to whip together in no time!! The only thing is I would recommend using the small straight pins as thumb tacks so it won't go all the way through the cork board. Happy Stamping!!

Wednesday, December 15, 2010

Giftables Class - Candle Holder

This next project involved a bit of recycling some old soda cans. What's fun about this one is the look totally changes depending on what type of soda can you use.


I loved this one too!! We cut out several flowers from the flower fold die. You can get the 3 smaller flowers from 2 soda cans. The middle layer we ran through the Petals a Plenty embossing Folder and used the silver side to face up. We used a brad to keep the layers together (going up from the bottom) and then placed a little tealight over the center. You can curl the ends with the end of a paint brush, it gives it a finished touch.

I thought that was soo cute but thought it was even cuter as an ornament.

In the center I just added a Big Button to the center!! My son's teacher will each be getting on of these for Christmas!! Happy Stamping!!

Tuesday, December 14, 2010

Giftables Class - Candy Wrapper

When I saw the Candy Wrapper die in the mini catalog I just had to have it!! It is like to candies you get at Christmas time and the Jolly Holiday DSP is the perfect paper for this next project!

The perfect saying for this candy wrapper is the one I used in this project from Tag til Christmas set. I backed that with a piece of red card stock cut out with the large scallop punch, with we then used our white gel pen to add the dots. I do have to say it was tricky at first to close the box but after you do one side they are much easier after that. Happy Stamping!!

Monday, December 13, 2010

Giftables Class - Paper Ornament

This was the next project from my giftables class. Ornaments are always a fun gift idea and this one takes no time at all to make.

I used the Jolly Holiday DSP and just curled it as well as Cherry Cobbler cardstock. Cute and simple!! Happy Stamping!!
Related Posts with Thumbnails