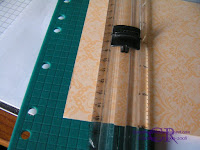
Start with a 6x6 piece of paper. You are going to score on all four sides at 1 1/2".

On two sides cut along score line until lines meet. Do this only on the two ends.

It should look this.

You will then need to cut a square in the inside of the top. You will cut 1/2" in from the score lines going around each side to create the square.

Take a small cello bag and cut it into half and then half again. Run adhesive along all four edges.
Lay this on the inside of the square you cute. This will be the inside of the box.

Put tape on the top side of paper in the four corners

Tuck the taped corners to the inside flap to create the box.

It will look like this when done.
To make the bottom follow the same instructions minus creating the window. It will then tuck into the top.
Hope you found this helpful and that I didn't confuse you all. Don't forget about the Holiday Extravaganza sale tomorrow! Happy Stamping!


8 comments:
Cool Box!
I'm going to have to try this one. We're making a similar box in my class tonight so I'll try punching a window in it and see what happens. TFS, Sister!
Very nice, thanks for sharing (:
Thanks for the tutorial!!
Brandi
Great box. These would make very nice gifts for teachers, etc.
this is a cool box, will have to remember this one!
So cute, and a great tutorial!!!
I love that! TFS!!
Post a Comment