A bit back I showed you a cub scout calendar project I made. If you don't remember it can be found
here. I colored in the image using watercolor crayons. I thought I would do a tutorial using them and probably the simplest way is just by coloring and then blending.

Start with you solid image. Some
recommend that you use a
permanent ink like
staz on, but I always use my regular basic black unless I plan on using a lot of water to blend, then it will smear.

Color in your image using the water color crayons. Color it in to your specifications. You don't have to be exact when coloring in the image, you will be blending in the color.

Once you have all the image colored in you will run you blender pen over the coloring to smooth and blend in the color. You can also use the aqua painters or paint brush. I personally like the blender pens better. I would also
recommend doing each color
separately if doing mass images so that your colors stay crisp.

Your image should look like this when all blended in. I did go out of the lines a bit and though usually I am particular about perfection I have begun to learn that it's not as noticeable as I think it and most people who get these as gifts don't care or notice. I hope you found the tutorial useful. Happy Stamping,


 Here is another 6x6 recipe swap I did. I love making these things. Not that I have time to cook any of them but if I ever do feel like cooking I can pull out these adorable little swaps. I wanted it to look like a pumpkin patch. If you use real pumpkin instead of canned these pancakes come out great!
 The idea I had never translated properly. AND this was the better one I made like seven version's but finally gave up. So then I decided to try again. #'s 2 and 3
 These are slightly better but they are still missing the cute factor. I could put this little guy on a 3x3 and it would probably be cute. But that wasn't what I made him for.


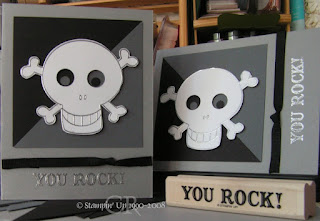 I couldn't decide which orientation I liked the best so I made a couple of each.
 I was very pleased in how it came out, better than what I originally had in mind. Sometimes my "brilliant" ideas don't come out so well. I got the clear plastic CD covers at Walmart. So what do you think?







 Posts
Posts


