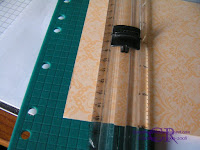
 I made this card off a case of another card I made which I'll show later this week. It was fun to make something not related to Christmas ... even though I still haven't made my cards. So what do you think?
Saturday, November 29, 2008
Blogger 3 Challenge 1
 I made this card off a case of another card I made which I'll show later this week. It was fun to make something not related to Christmas ... even though I still haven't made my cards. So what do you think?
Friday, November 28, 2008
From Card to Scrapbook Page
 To make the main background paper I used glossy cardstock and the crayon resist technique. I crimped the really rust piece of card stock. Then I made this 6x6 scrapbook page. I used all the elements just changed the placement and orientation a bit.
 This card and page is one of my all time favorite's, it's got to be because Fall is the best time of the year. Happy Stamping!
Thursday, November 27, 2008
Happy Thanksgiving

Wednesday, November 26, 2008
Holiday Sale announced and a Table Setting Idea....
Now on to a swap I did on SCS. It was a Thanksgiving Table setting swap. This was probably on of the BEST swaps I did ... I got some super ideas I'll be using for next year. Anyways here is what I made.

I think they came out sooo cute!! But I think everything is cute. I was so excited to see this set go into the big catalog. As you all know sets from the mini's don't usually make it. They were pretty easy to make to!! I'm not going to ad a recipe today as it's close to midnight (even though this post won't show until midnight) I'm a bit tired and can't recall all the supplies right this moment. Working retail this is on of the busiest weeks for me. So in the meantime enjoy and Happy Stamping!!
Tuesday, November 25, 2008
Technique Tuesday - Window Box

Start with a 6x6 piece of paper. You are going to score on all four sides at 1 1/2".

On two sides cut along score line until lines meet. Do this only on the two ends.

It should look this.

You will then need to cut a square in the inside of the top. You will cut 1/2" in from the score lines going around each side to create the square.

Take a small cello bag and cut it into half and then half again. Run adhesive along all four edges.
Lay this on the inside of the square you cute. This will be the inside of the box.

Put tape on the top side of paper in the four corners

Tuck the taped corners to the inside flap to create the box.

It will look like this when done.
To make the bottom follow the same instructions minus creating the window. It will then tuck into the top.
Hope you found this helpful and that I didn't confuse you all. Don't forget about the Holiday Extravaganza sale tomorrow! Happy Stamping!


Monday, November 24, 2008
Holiday Extravaganza Sale
I don't have all the specifics yet as any good holiday sale you don't find out until the day it starts. But I can share with you the info I do know.
- The Sale starts November 26th and runs through December 1st.
- The will be great bundle pricing 20-50% off.
- Quantities are limited so act fast.
- Order through my online website.
- Call me and I can place your order.
Diabetes Awareness Month
 I didn't know that November is Diabete's awareness month. I learned this tidbit from Shelly. As some of you know my husband way diagnosed with Diabetes at the being of this year and was lucky that he didn't die from it, he was in pretty bad shape. He is doing wonderfully now and through out the year he has made a dramatic improvement. At many times has even shocked his doctor in how well he has managed to control it. So when I saw that this was a challenge I just knew I would have to participate. The awareness ribbon color for diabetes is gray to represent the drudgery of dealing with diabetes every day. A red dot is often shown on the ribbon to represent the multiple times a day that a diabetic must check their blood. If you'd like to learn more about Diabetes click on the Diabetes Ribbon. The challenge is to make a card using the colors gray and red .
 It's kinda of sappy why I designed the card they way I did but my husband is the joy in my life so I centered it knowing that was the stamp I was going to use. So if you have time please join the challenge. Happy Stamping!
Sunday, November 23, 2008
One Layer Card and CBC05

 So what do you think? I'm not completely sure I like my version of a one layer card. A bit more difficult than I thought, but I think it represents the challenge rather well. So if you have time join the combat boot challenge. Off to try a few more one layer cards ....
Saturday, November 22, 2008
Sunflower and a Tag
So what do you think?
I've been tagged by Marie. I haven't done this on before and thought it was kinda neat. Basically the rules are open your 4th picture file and upload the 4th picture. So this is mine:
Wow!! I can't believe how clean my desk was. It sure hasn't looked like this in forever. Plus I've changed the set up a bit. I know keep my stamp pads in air tight containers. So know I have to tag 4 people so .... Jennie, Michelle, Frenchie, and Saxontoy. Happy Stamping!
Friday, November 21, 2008
Demo Night 2nd project
The box was made from a 6x6 paper from last year level 1 hostess gift. It's the perfect size for a cupcake. Not that I would actually make that many to hold cupcakes so instead I used mine to put chocolate's in for my secret sis. Maybe I'll make a little utorial Tuesday for instructions on the box?? Would any of you be interested?
So on to the card I made it with the little scrap that was left over from the box. Can you believe it's actually a little 3x3 card?!?!? I know it's actually cute!! Not like my previous attempts which can be found somewhere on my blog which I'm not going to even link because they were sooo bad!! I glittered the frosting and the candles which are a bit hard to see from the picture. I'm going to have to try this 3x3's more as I'm starting to get the hang on them.
I also added a second blog which you can find my link to it on my side bar. It's the purple sunflower picture. Since this is My "business" blog showcasing my main passion using Stampin' Up! I do occasionally dabble in other products which my customers all know about. They call me their enabler, but I have no idea why. So anyways I decided I would but my "other" projects on this "other" blog. Since SU is my main source though this one will continue to be the one I use most often. Their product is much better quality. Happy Stamping!

Card Recipe: Stamp Set - Bitty Birthday, Cardstock - Prints Pack DSP (SS 2008 Hostess-Level 1), and Whisper White, Accessories- Markers Summer Sun, Pixie Pink, Pink Passion and Ruby Red, Irridescent Ice, Versamarker, and Dimensionals.
Box Recipe: Cardstock - Whisper White 6x6 and Prints Pack DSP (SS 2008 Hostess-Level1), Accessories - Pink Grosgrain Ribbon and Small Cello Bags.
Thursday, November 20, 2008
Another Project From Demo Night
I think it is stinkin' cute!! I'm a little partial I guess. It's a door hanger but the wonderful Demo's I get together with suggested how it would be perfect for a wine tag!! I sure never thought of that which is a perfect reason why it's great to have these demo get together's especially with these gals who are super creative. I''ll show the other little project tomorrow. Hopefully I can get one of the Ladies to get me a picture of what they made this month since I couldn't make it. Happy Stamping!
Recipe: Stamp Set - Holiday Lineup, Cardstock - Kiwi Kiss, Chocolate Chip, Whisper White, Ridinghood Red and Holiday Treasures DSP, Accessories - Top Note Die, Big Shot, Jumbo Eyelets, Chocolate Chip Ribbon, Paintbrush, Tombo Glue, Dimensionals, Markers and Chalk.
Wednesday, November 19, 2008
Card as promised and few other things...
The other day in the mail I received this wonderful card. Pam has been a long time friend and fellow stamping addict :)
You can't tell in the picture but the image is done on shimmery paper, the picture just doesn't do it justice. So Pam when you gonna come up to stamp??
Lastly I got this super cool award from a fellow blogger Jennie. She has the great blog if you get a chance check it out.
There are a few rules to the award which are: 1.The winner may put the logo on their blog.2. Put a link to the person that sent you the award.3. Nominate 5 blogs.4. Put links to their blogs.5. Leave a message for your nominees.So in no particular ordering here is who I am nominating:
http://bootstostamps.typepad.com/from_combat_boots_to_rubb/ Marie
http://squareheadedstamper.blogspot.com/ Brandi
http://www.designsbybrooke.blogspot.com/ Brooke
http://igotstamps.com/ Jenn
http://www.rubberobsession.blogspot.com/ Carol
If you get a chance peruse their blogs, they all have a different variety of stamping style and even a few have some neat challenges. Happy Stamping!

Tuesday, November 18, 2008
Technique Tuesday - Emerging Color
First you will need to stamp randomly on your base image (works best on glossy cardstock), using a variety of color. Try to fill in as much space as possible.Then take a stamp that is larger and ink it up with versamark and stamp to one side of the cardstock. In the picture you can see a slightly different color where I stamped my versamark image.
Take your brayer or sponge (sponging will take longer) and ink it up with a darker color and run it over your entire piece of cardstock until you have covered it all evenly. You should not be able to see any of the stamping you did except for where you embossed.
Take a kleenex and wipe of the extra ink that is on the embossed image.
Your base should look like this.
I'll share with you my final card tomorrow. Hope you liked and found the tutorial helpful. Happy Stamping!!


